Tutorials and your certificate
If you still have required tutorials to complete, the app opens Tutorials before you can work with real classes and assessments. There are two tutorials, Check your class and pupil information and Test Assessment Round, and you do them in that order. Until both are complete, the app keeps you on the Tutorials screen and New Assessment stays locked. Later, use the tutorial card on your home screen to return or replay a tutorial.
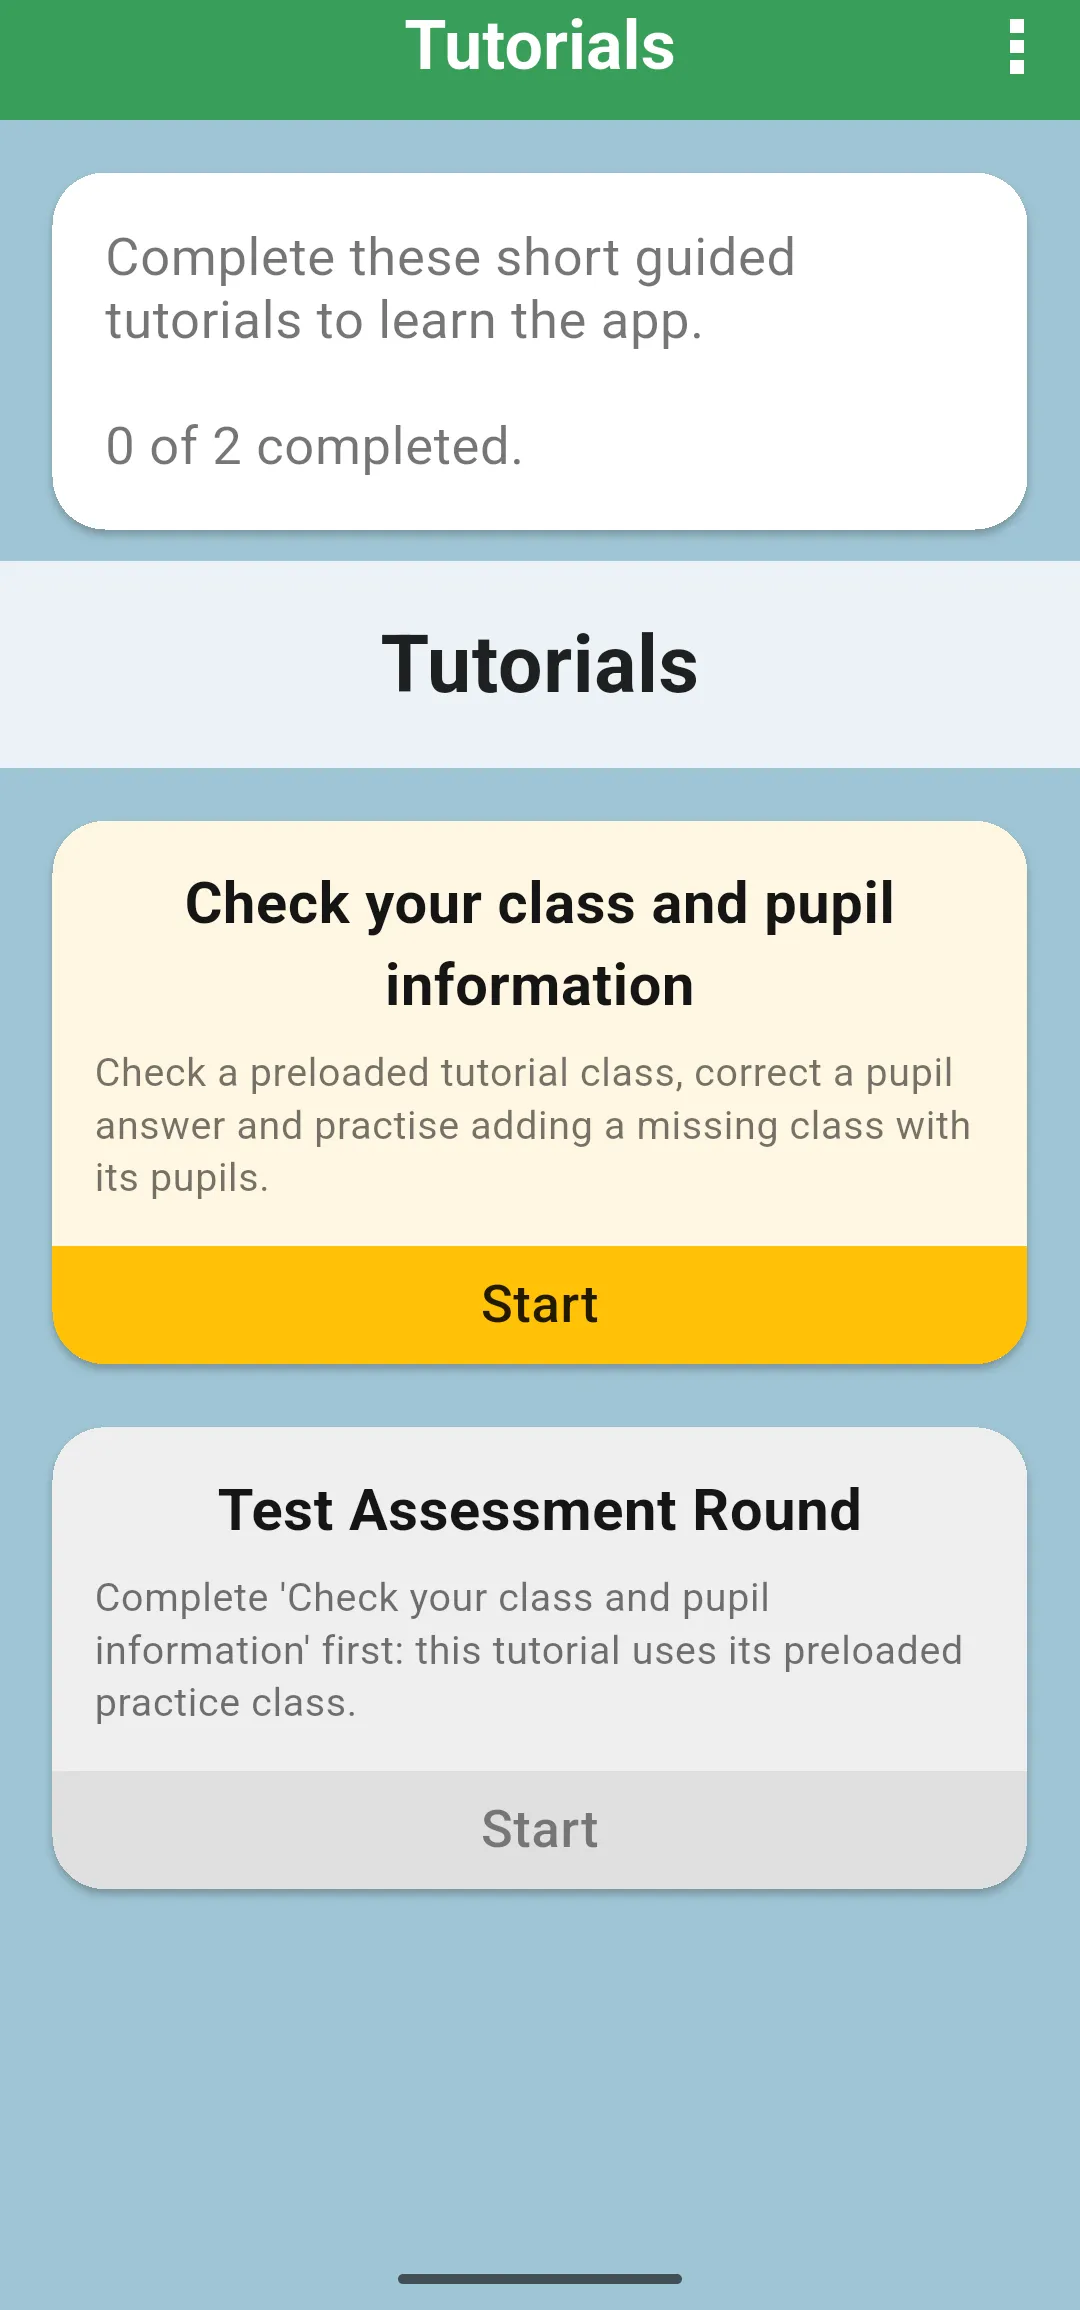
The second card stays grey until the first tutorial is complete, because the assessment practice uses the tutorial class from the first one.
Choose the interface language
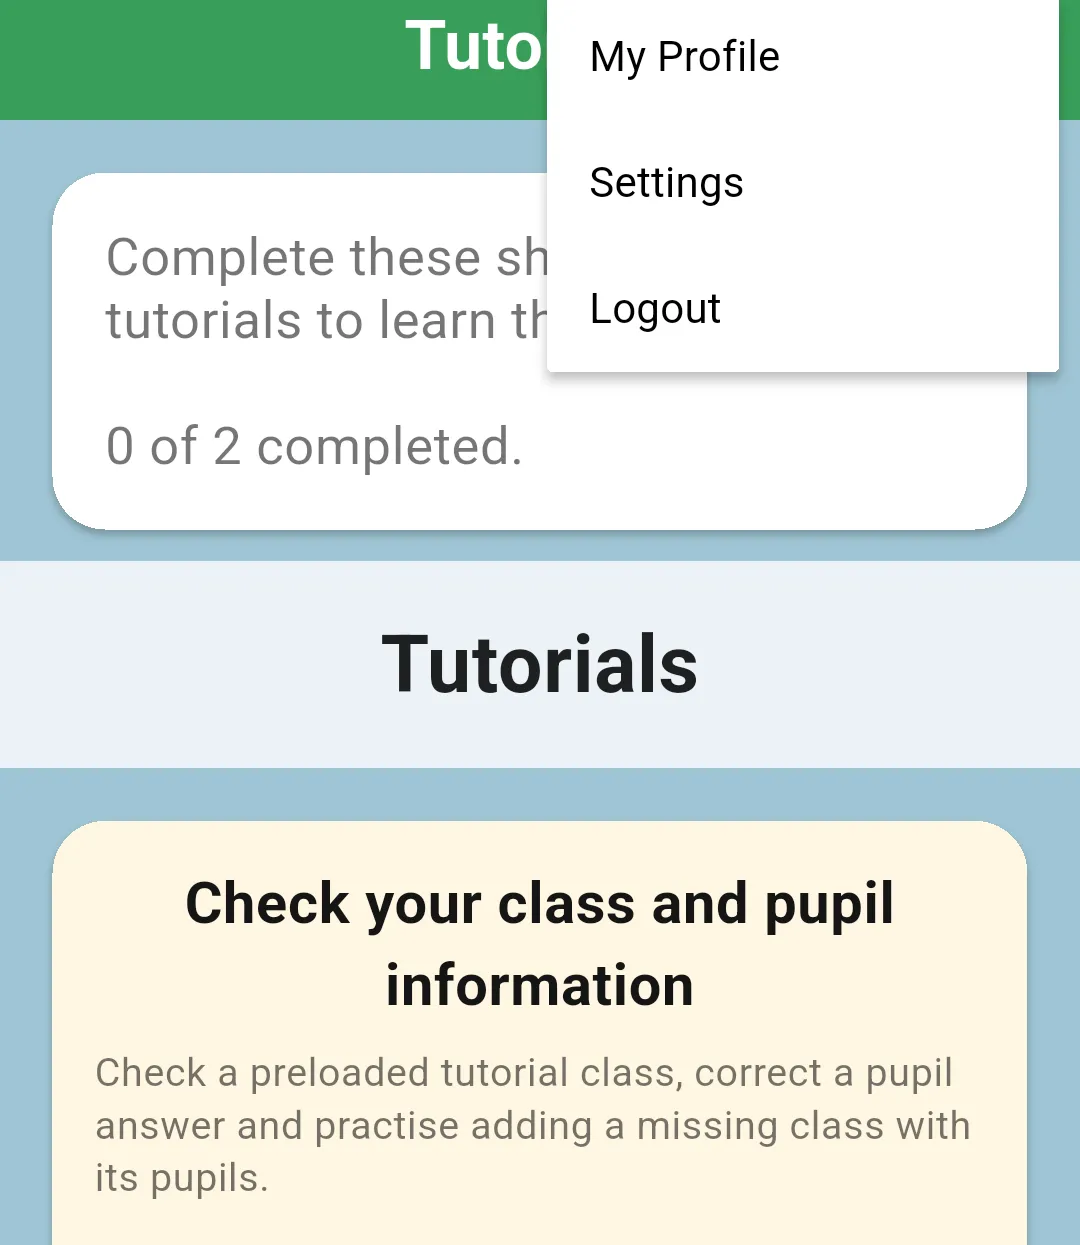
Section titled “Choose the interface language”On the Tutorials screen, open the three-dot menu and choose Settings. Under Language, select English, Afrikaans or isiXhosa, then go back to the tutorials. Your choice is saved and changing it does not clear your tutorial progress. The same menu also has My Profile and Logout.
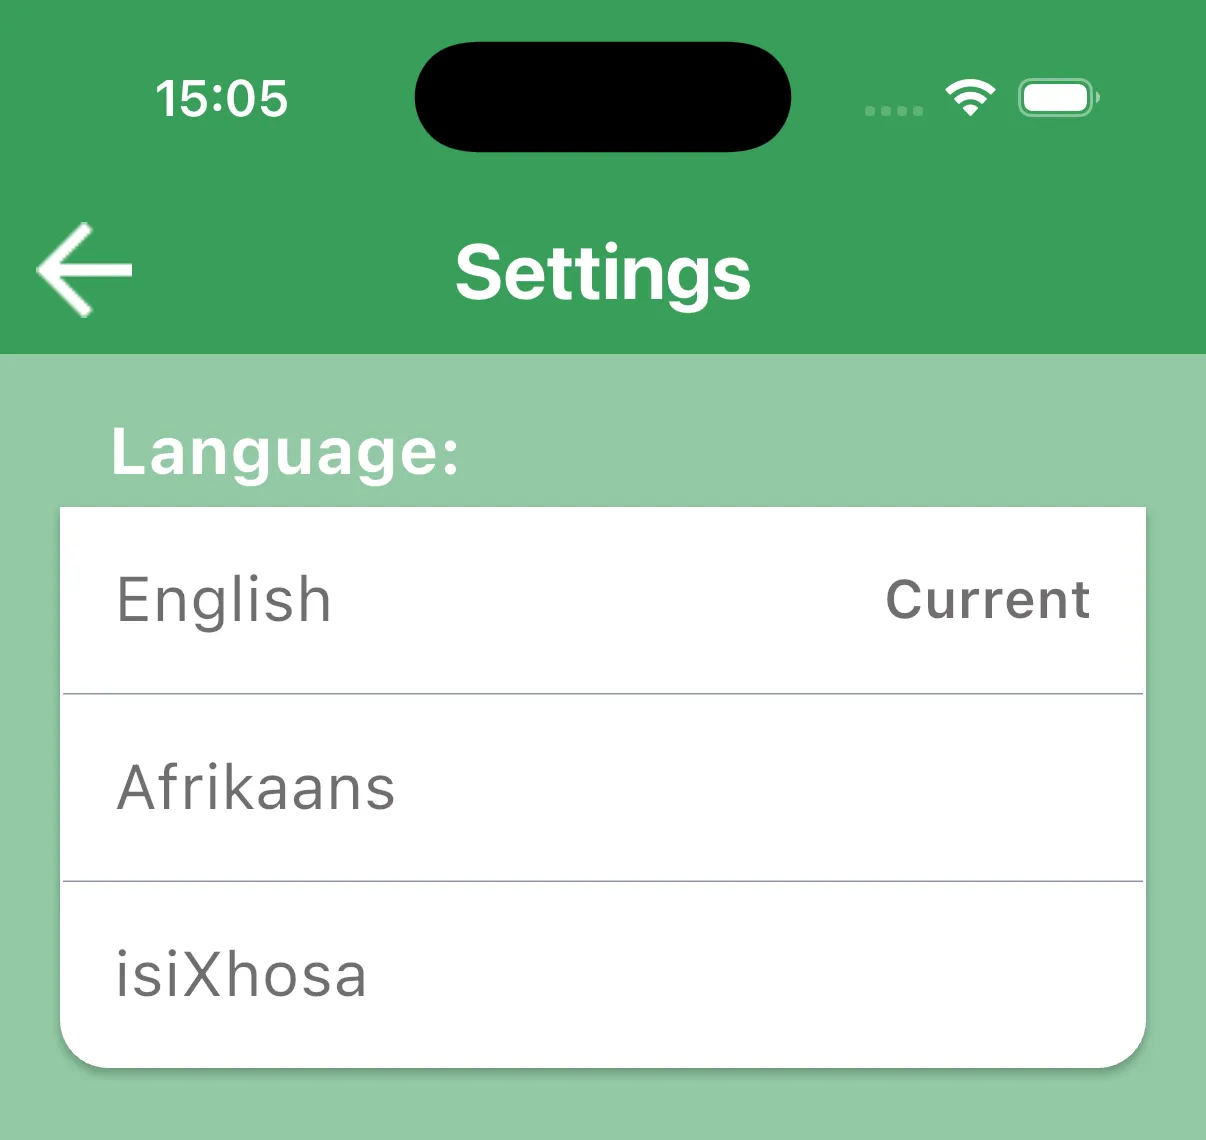
This changes the app interface; it does not translate the assessment material. Use the form and language assigned for the pupil’s assessment.
How a tutorial works
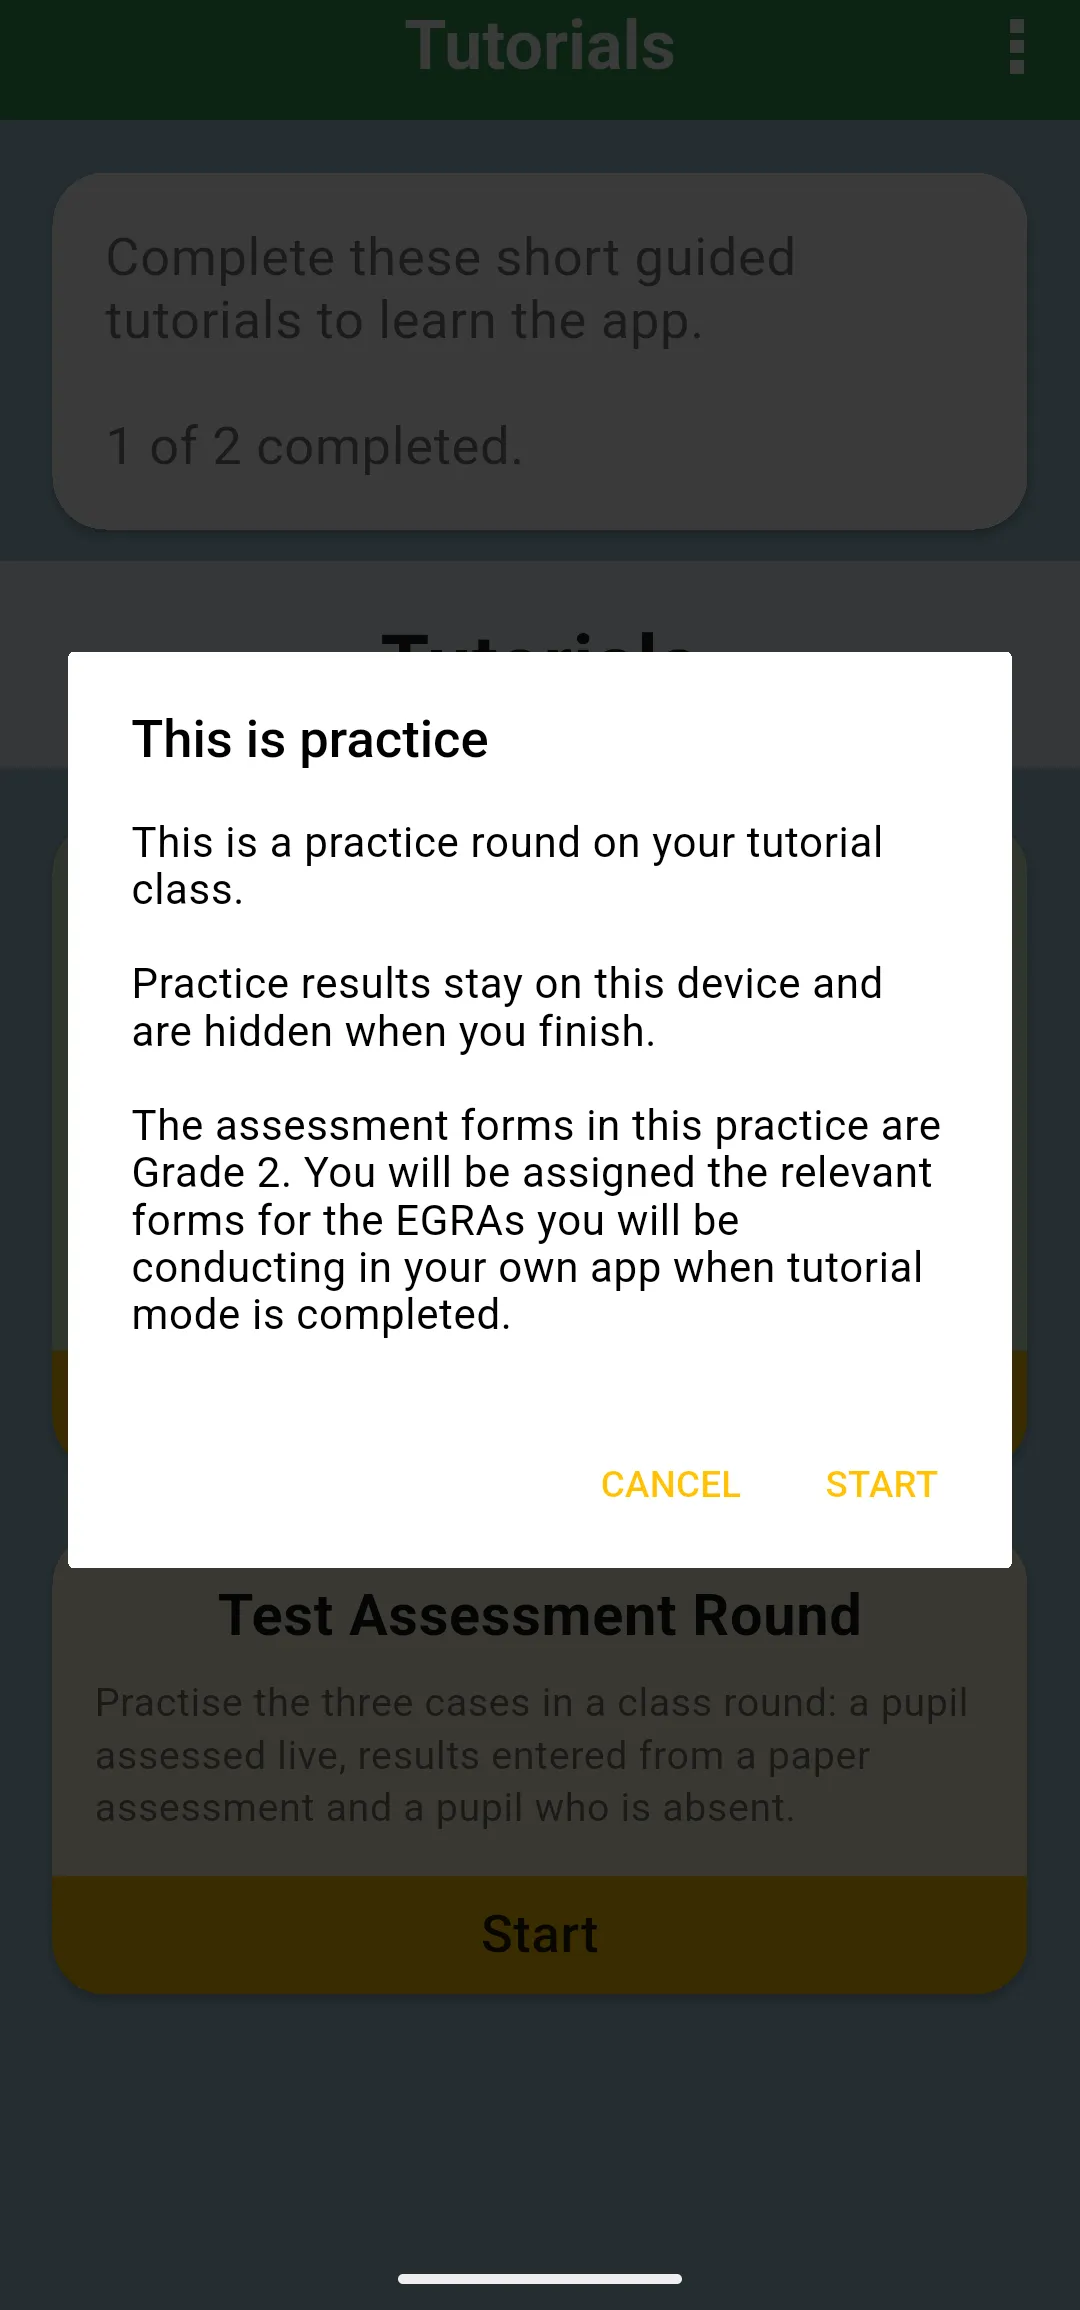
Section titled “How a tutorial works”Tap Start on a tutorial. The app first shows This is practice, which says what the tutorial will create and that practice records stay on your device. Tap Start again to begin, or Cancel to go back.
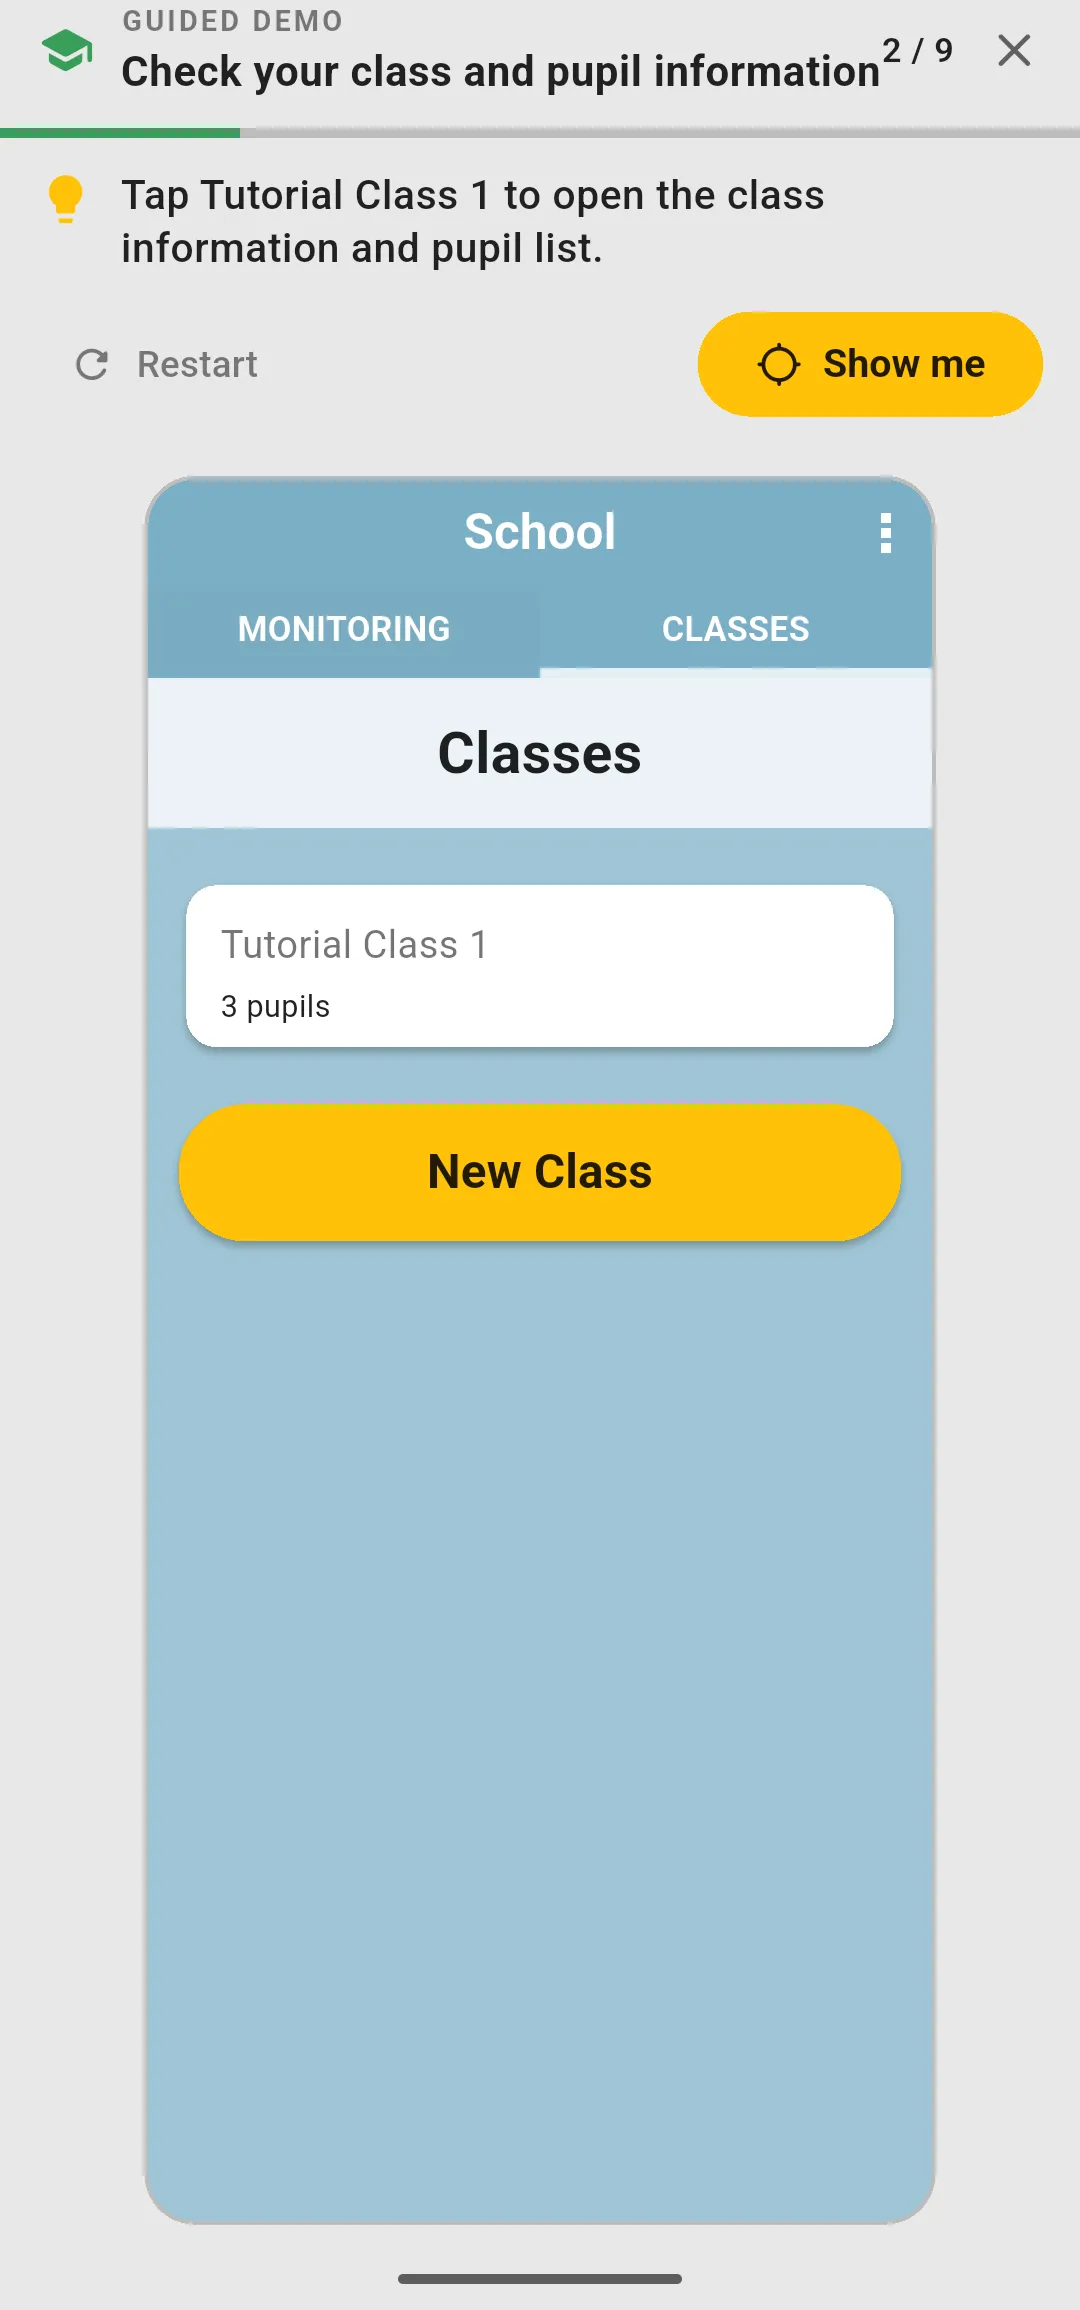
During the tutorial, the app appears inside a frame, under a GUIDED DEMO band:
- The top line shows the tutorial name, the step you are on (for example 2 / 9) and a green progress bar.
- The line with the light bulb tells you what to do next. When you do it, the tutorial moves on by itself.
- Show me points out the control you need, and switches to the right tab first if it is not on screen.
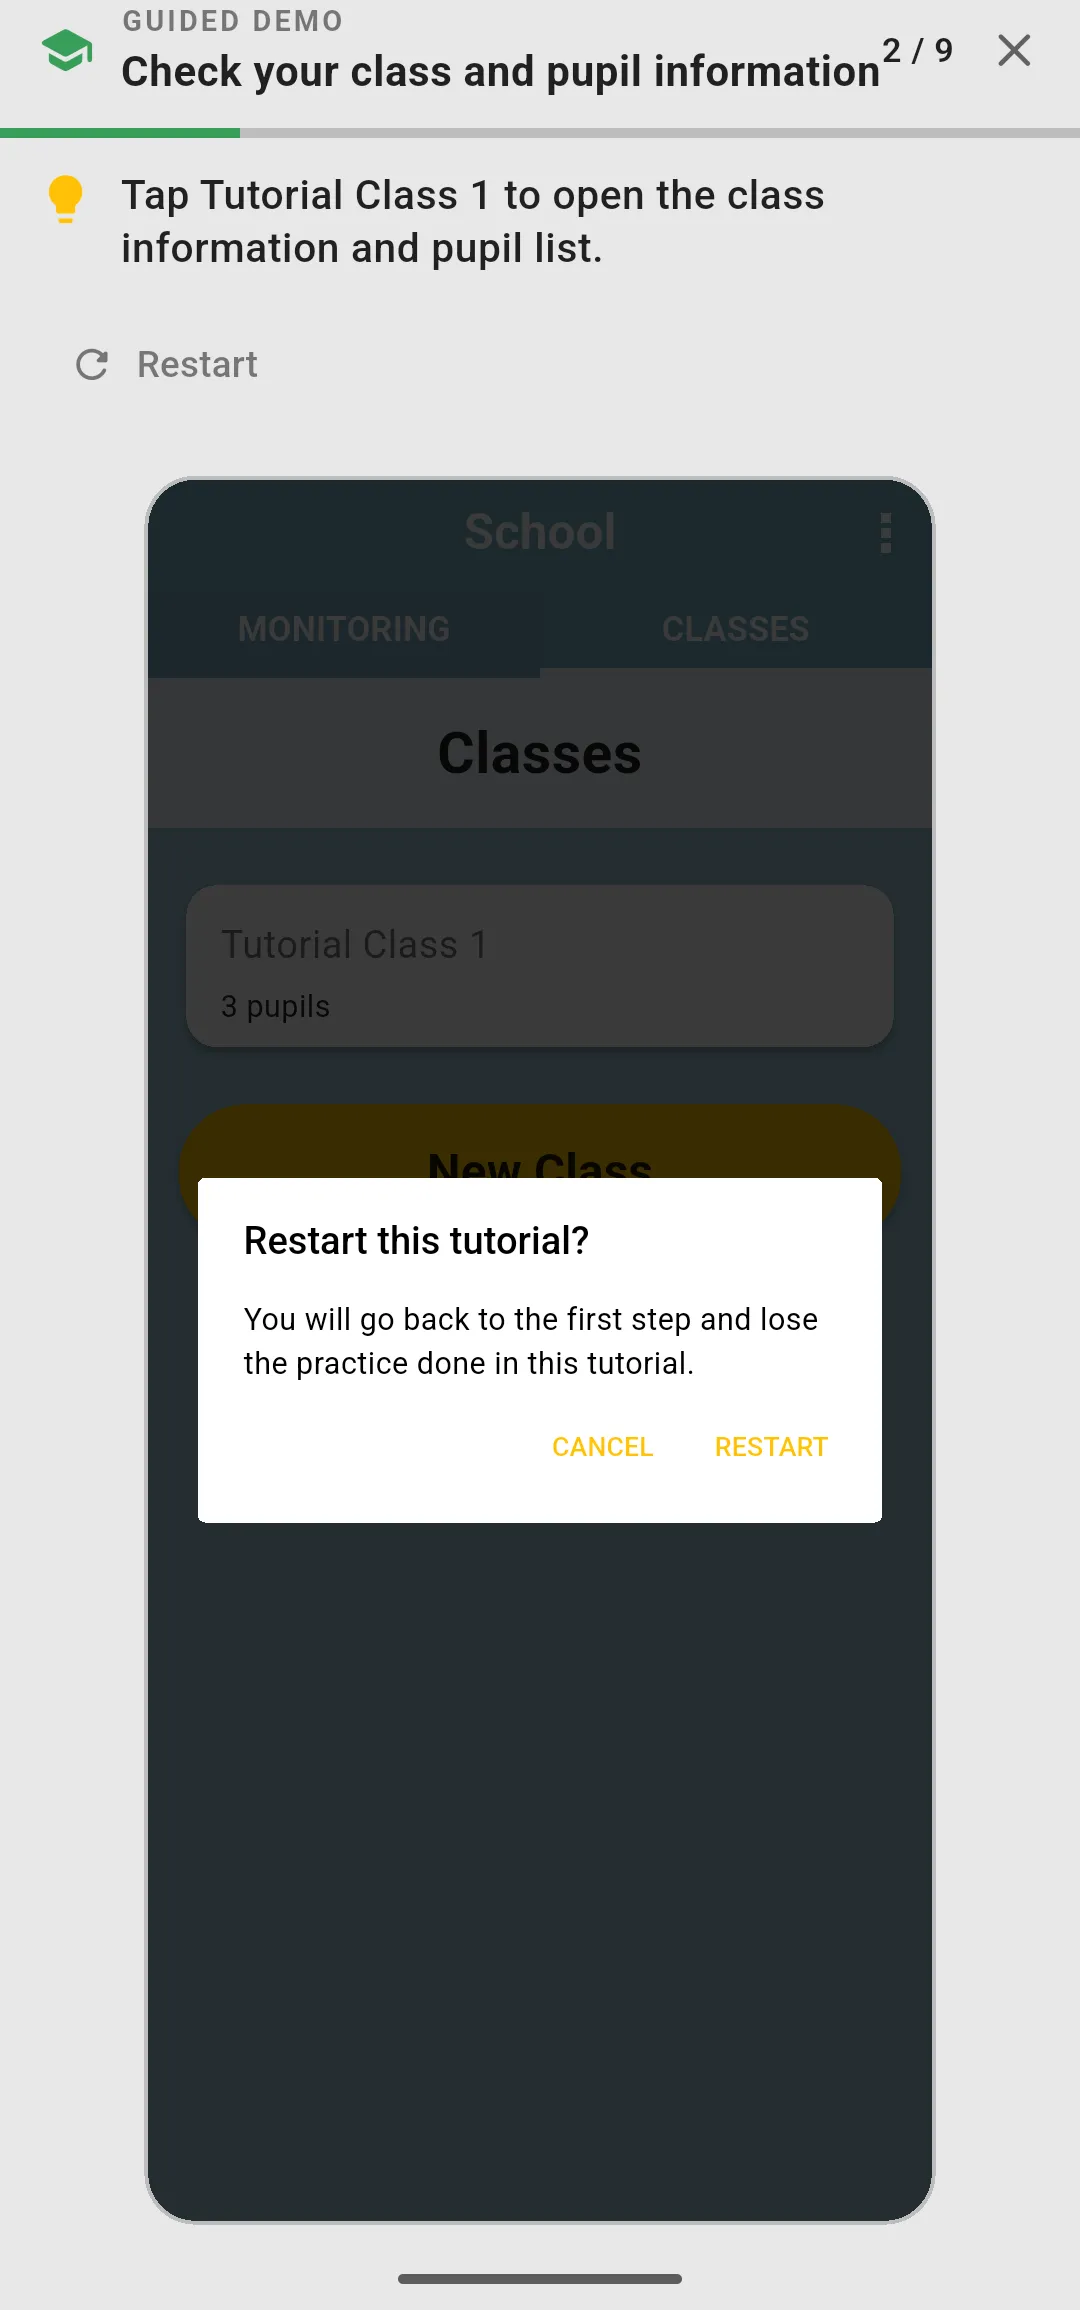
- Restart (from the second step on) asks Restart this tutorial? first. If you tap Restart, you go back to the first step and lose the practice done in this tutorial. Tap Cancel to carry on where you were.
- The X at the top right leaves the tutorial without completing it and takes you back to the Tutorials screen.
- Finish appears on the last step, once your completion has synced.
Tutorial 1: Check your class and pupil information
Section titled “Tutorial 1: Check your class and pupil information”This tutorial has 9 steps. It uses Tutorial Class 1, which contains three fictional pupils. Your real teacher, class and pupil records will normally already have been uploaded.
- Tap the CLASSES tab.
- Tap Tutorial Class 1 to open the class and its pupil list.
- Tap Tutorial Pupil 1, scroll down to check their information, then tap the back arrow to return to the class.
- Tap Tutorial Pupil 2, scroll down to check their information, then tap Edit Pupil Info below their details.
- Tap an answer that needs correcting and change it. If a box opens, tap Save in its top right corner. Then tap Complete Questions at the bottom of the screen to submit the change. The tutorial only moves on when an answer really changes, so choosing the answer that is already selected does not count.
- Check your saved correction, go back to the school home screen and tap New Class. The name Tutorial Class 2 is already filled in: tap Save. This practises adding a missing class.
- Add two pupils to Tutorial Class 2. Tap Add Pupil, type a practice name such as Tutorial Pupil 4 and tap Save. Answer all of that pupil’s questions and tap Complete Questions. Repeat for a second pupil.
- Tap the back arrow to return to the school, then tap Sync on the red Sync Needed bar. Your tutorial completion is sent; the practice classes and pupils stay on this device.
- Tap Finish.
Tutorial 2: Test Assessment Round
Section titled “Tutorial 2: Test Assessment Round”This tutorial has 12 steps. It practises the three cases in a class round: a pupil assessed live, results entered from a paper assessment and a pupil who is absent. The assessment forms in this practice are Grade 2; your own forms are assigned for real work when the tutorials are complete.
- Tap the MONITORING tab.
- Tap New Assessment.
- Tap the WCED EGRA assessment for your language (English, Afrikaans or isiXhosa).
- If the app asks for a class, tap Tutorial Class 1. Headteachers first choose Self Assessment for this practice round.
- On the TEACHER tab, open Teacher Questions, check the prefilled teacher answers and tap Confirm details. Missing values are practice examples (the phone number is 0000000000), not changes to your real teacher profile.
- Tap the PUPILS tab to see the three tutorial pupils.
- Assess Tutorial Pupil 1 live: the pupil reads from the paper sheet and you score in the app. Tap Start Assessment under their name, tap Review next to Pupil Questions to check their information, then do each test in turn. The band tells you which test comes next (for example test 1 of 4) and which option to choose for it, such as Pupil reads from the paper sheet, you score here in the app.
- Enter the results of Tutorial Pupil 2, who did the assessment on paper earlier. For each test, choose Enter results of an assessment already done on paper, copy a few results and tap End Test. For a timed test, tap Tap to enter, type how many seconds the test took and tap Save. Then tap Confirm Assessment Completed.
- Imagine Tutorial Pupil 3 is absent today: scroll to their card and tap Not Assessing.
- Tap Complete Assessment, then Yes, complete.
- Tap Sync on the red bar. That is how you send your work when you are working for real.
- Tap Finish.
The practice classes and answers stay on your device and are hidden outside tutorials; the practice round does not appear in Past Assessments. Sync sends your completion record, not your practice assessments. The app prepares the practice class automatically, including when you replay the assessment tutorial after reinstalling. Restart begins the current tutorial again without changing another teacher’s practice records.
When you have finished
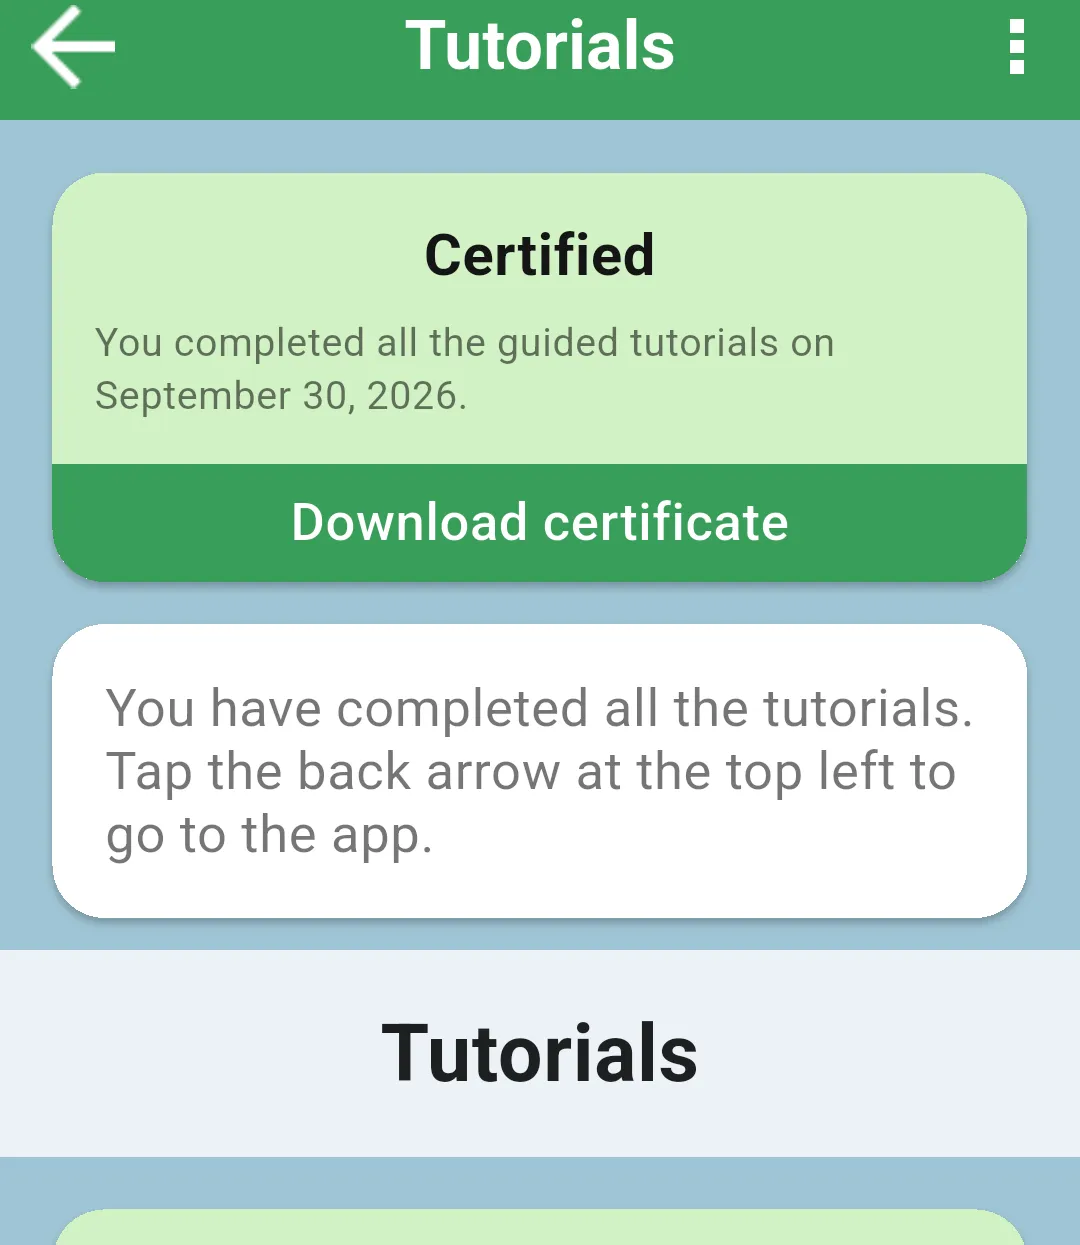
Section titled “When you have finished”After both tutorials, the Tutorials screen shows Certified and the message You have completed all the tutorials. Tap the back arrow at the top left to go to the app. Tap the back arrow: New Assessment and the rest of the app are now available.
To practise again, tap Tutorials completed on your home screen and then Replay on a tutorial. Starting a tutorial again first removes the practice left by its previous run: for example, Tutorial Class 2 is gone when you replay Check your class and pupil information.
Download your certificate
Section titled “Download your certificate”After both required tutorials are complete and your completion has synced, the Certified card shows your completion date.
- Tap Tutorials completed on your home screen to open Tutorials.
- Tap Download certificate on the Certified card.
- Choose where to save or share the PDF using your device’s share sheet. On Android, the share menu shows the file jolly-monitor-tutorials-certificate.pdf and apps such as Print, Gmail or Drive. On iPad, Save to Files saves a copy; printing and sharing options depend on the apps installed on the device.
The A4 certificate contains your name, completion date, and the Universal Learning Solutions (ULS) and Western Cape Education Department (WCED) logos. It records completion of the Jolly Monitor guided tutorials. The logos are bundled with the app, so certificate generation does not need an internet connection once the Certified card is available.
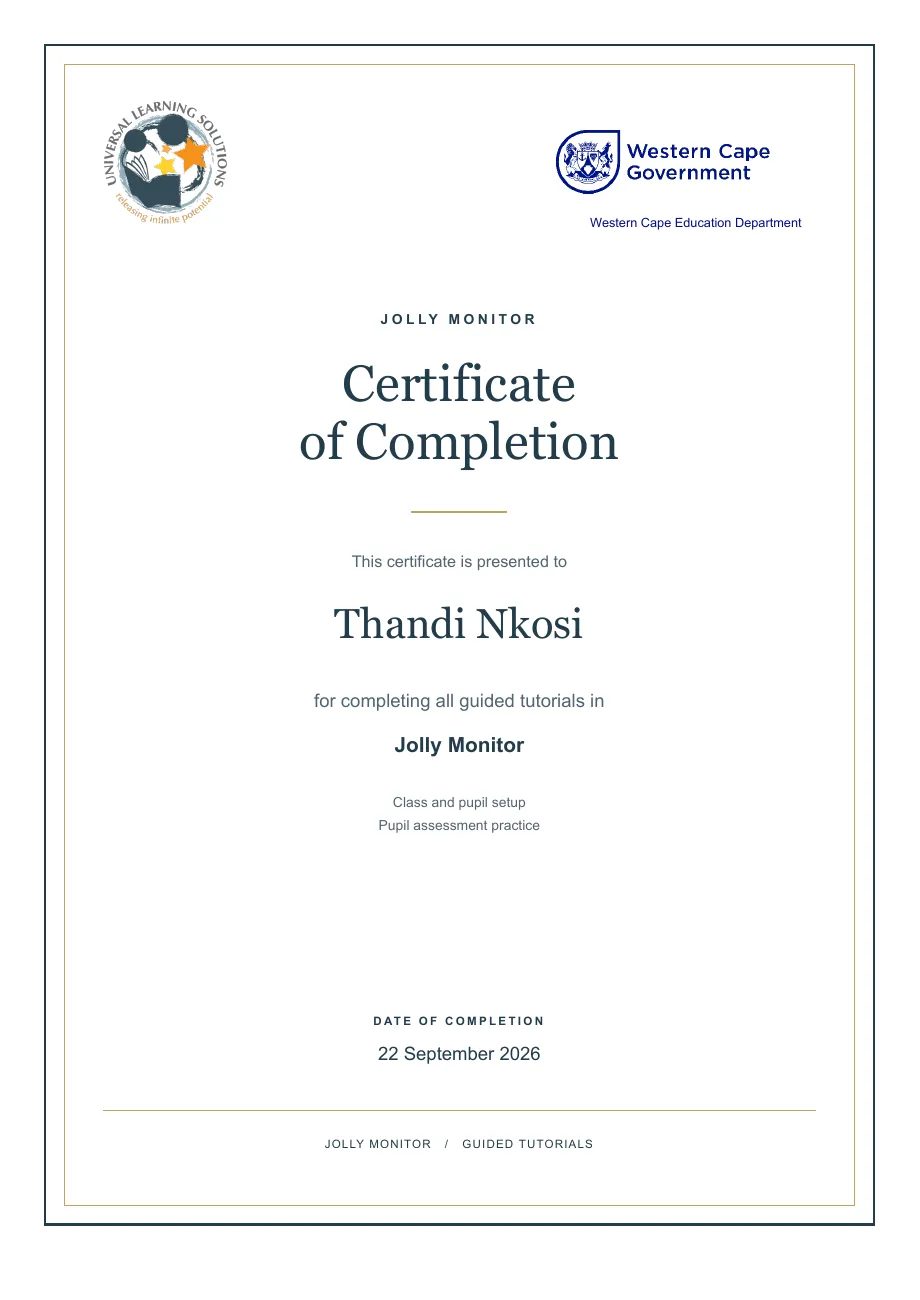
Example certificate; your PDF uses your own name and completion date.
If the card has not appeared, check that both tutorials show completed and sync again. If the PDF cannot be created, try the download again.